Showing posts with label RECIPES. Show all posts

Tuesday, January 17, 2017

Jalapeno Jammy Time

When we finally pulled our garden last fall, we ended up with a couple pounds of green jalapenos. Since I had already dried a bunch of ghost chilies, I decided I wanted to do something slightly different with the jalapenos. If they were red, we'd make some homemade sriracha (via this Serious Eats recipe), but as they were not, I had some fun making jalapeno jam.
Abundance of jalapenos!

Sweet & Spicy
Jalapeno Jammy Time
  • 2 lbs green jalapenos (if you must, remove the seeds, but I like the heat!)
  • 3-4 cups granulated sugar
  • 1 1/4 C apple cider vinegar
  • 2 limes (zested and juiced)
  • 1 t kosher salt
  • 1 packet Sure Jell liquid fruit pectin (3 oz)
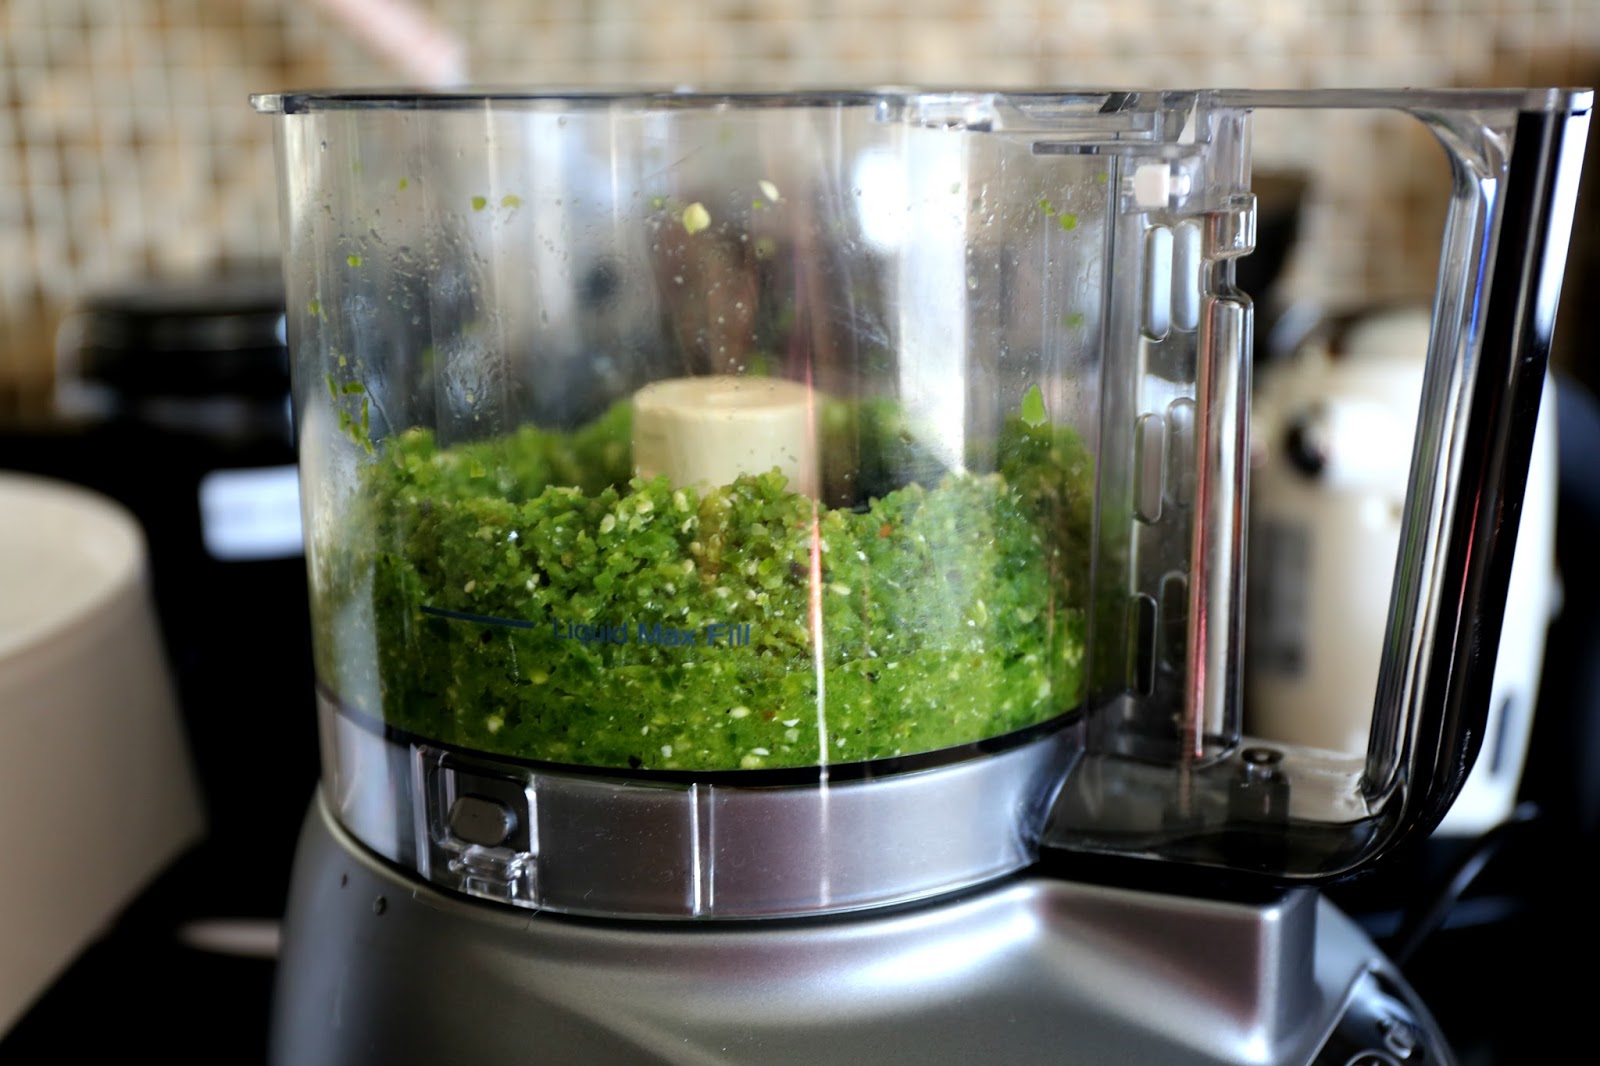
  1. Using a food processor, finely chop the jalapenos.
    Mmm..jalapenos.

  2. Transfer them to a pot and stir in sugar, cider vinegar, lime juice and zest and salt. Heat over medium-heat until it boils and reduce the heat to low for 10-12 minutes. Stir constantly.
Doesn't look great, but tastes wonderful.
  1. Turn the heat on high until it boils - stir in the pectin and boil for another minute. Continue to stir, and then remove from heat.
  2. Let cool. You can can these or if you know you'll devour it quickly, just stick it in the fridge.
    Big jar for me and a lil' jar for my mother!
This tastes great with stinky and salty cheeses. It's also good as a spread on sandwiches.


Thursday, November 3, 2016

"Lactation" Cookies a.k.a Feel-Good Oatmeal Cookies

As I mentioned a couple of posts back, I'm trying to breastfeed and haven't been able to produce enough milk. Everyone has a theory on how to produce more milk:
  • Grandma says to drink soup
  • Mom says to drink soup and eat papaya
  • The lovely lady who's daughter owns my Saturday donut bakery said to eat apples
  • Friends suggested lactation cookies / eating oatmeal
I did a little research, there's not much science to any of the above. Really all you can do is pump / feed more to create more supply (your boobs believe in economic equilibrium, they produce as much supply as there is demand).

But that didn't stop me from making these cookies. I tweaked a couple of recipes I found online and came up with the below. Really, it's all about adding some "nutritional" value to cookies and all the cookies were oatmeal based. While they probably aren't helping me produce much milk, they are a great quick snack!


"I'll Make a Cow Out of You" Cookies
  • 1 1/2 C Old-Fashioned Rolled Oats
  • 3/4 C AP Flour
  • 3 T Nutritional Yeast (Optional)
  • 2 T Ground Flaxseed (Optional)
  • 2 T Wheat Germ (Optional)
  • 1/4 t Baking Powder
  • 1/4 t Baking Soda
  • 1 t Ground Cinnamon
  • 1/4 t Kosher Salt
  • 6 T Unsalted Butter (Room Temperature)
  • 2 T Coconut Oil (or an additional 2 T of Butter)
  • 1/4 C Brown Sugar
  • 1/4 C White Sugar
  • 1 Egg
  • 1 T Vanilla Extract
  • 1/2 C Dark Chocolate Chips
  • 1/4 C Unsweetened Coconut (Optional)
  • 1/3 C Chopped Walnuts (Optional)
Preheat oven to 350°F. Mix together oats, flour, yeast, flaxseed, wheat germ, baking powder, baking soda, cinnamon and salt in a medium bowl. In a larger bowl, cream together butter and coconut oil. Once mixed, add the sugar and beat until "fluffy". Add the egg and vanilla extract and mix until well combined. Slowly mix in the dry ingredients (1/4 of the mixture at a time) to keep it from flying everywhere. Once it's all combined, using a wooden spoon or spatula, mix in the chocolate chips, coconut and walnuts (you can substitute any of the mix-ins for whatever you like). I use a cookie scoop, but if you don't have one, I'd make about a 1 in. size ball and squish it half way down (these cookies don't really spread). Bake for 10-12 minutes. Let cool for a minute before letting them fully cool on a wire rack. I store these for about a week (and by store, I mean, I will eat them over the course of a week).

They're an easier sell to others if you don't call them lactation cookies. Joe eats one every day.


"Who is Mom? I'm just happy to see my Cow"


Wednesday, October 26, 2016

Recipe: Notorious Chex Mix

This Chex Mix made its original appearance at Notorious BYG's baby shower in NJ. I've been tinkering with the recipe for weeks and I think I'm finally happy with it. It's definitely #yugagnonstyle, just like BYG.


Notorious Chex Mix

Ingredients:

  • 3 C Corn Chex Cereal
  • 4 C Crispix Cereal
  • 2 C Wheat Chex Cereal
  • 1.5 C Cheerios Cereal
  • 1 C Peanuts
  • 1 C Cashews
  • 1 C Pretzel Pieces (unsalted if you can find it!)
  • 2 T Sesame Seeds
  • 2 T Seaweed Flakes (optional)
  • 4 T Melted Butter
  • 2 T Soy Sauce
  • 2 t Sesame Oil
  • 3 T Furikake Seasoning (Urashima's Furikake Teriyaki Bonito is my favorite)
  • 3 T Brown Sugar
Pre-heat your oven to 250°F. In a large bowl mix the cereals, nuts, pretzels, sesame seeds and seaweed flakes. In a measuring cup, mix the melted butter with the soy sauce, sesame oil, furikake seasoning and brown sugar. Once the liquids and seasonings are thoroughly mixed, used one hand to drizzle the mixture into the bowl with the cereal and use the other clean hand to toss the mixture furiously (BYG would!) to ensure even coating. Once the two mixtures are combined - pour it onto a baking sheet and spread it into an even layer. Bake for 1 hour, giving it a stir every 15 minutes. Once cool, you can store it in an airtight container for up to 2 weeks (but I'll bet it won't last that long!)


Saturday, August 8, 2015

Recipe: Chorizo Hash with Sous Vide Eggs

A touch of habanero hot sauce takes it to a whole other level!
Chorizo Hash with Sous Vide Eggs!
Serves 2 (but easy to half and make for 1!)
Special equipment: Sous Vide (if you have!)

Ingredients

  • 4 eggs
  • 2 Russet potatoes
  • 1/2 medium onion (diced)
  • 1/2 medium red bell pepper (diced)
  • 2 cloves garlic or 2 sprigs of garlic scape (if you can find it)
  • 1 link of chorizo (I use the uncured type, if you use the harder chorizo, just dice it)
  • Herbs of your choosing (I like rosemary and thyme)
  • Handful of cilantro
First, if you're going to sous vide your eggs, get your water bath started and set to 62.5°C. Once it reaches that temperature, gently put your eggs in for 1 hr. If you don't have a sous vide - try making a 6 minute egg (boil water, drop down to simmer, put in egg, time for 6 minutes and then run under cold water). If all fails - make some over easy eggs.
Nice not bath for my lovely eggs.
Pre-heat a non-stick pan over medium flames with about 1-2 T of olive oil. Peel and dice your potatoes into 1 cm cubes. Get them into the pan and toss them in the oil. Continue to toss them every couple of minutes and allow them to cook through and slightly brown.
Any breakfast that starts with potatoes is off to a good start.
As you cook your potatoes, get the rest of your ingredients ready!
Mise en place like a boss!
Once the potatoes have cooked through, toss them into a bowl with a little salt and half of your chopped or dried herbs. Seasoning potatoes while they're warm gives them a great flavor.

In the pan that the potatoes just came out of, put down your chorizo with your garlic and break it up into small pieces.
The smell of chorizo is intoxicating...or maybe it's the garlic.
Once the chorizo is broken up and 75% cooked through. Add the red pepper. Cook for about 2 minutes and add the onion. I always find that if I don't stagger it, the onions are mush before the pepper finished cooking.
Onions and peppers are a breakfast's best friend.
Once the onions and peppers are about cooked through, throw the potatoes back in. Add some salt, pepper, and the rest of the herbs along with your cilantro!

Toss it all together and divide into two plates. Keep warm if you need to, if not, run your eggs under cold water for 30 seconds (so you can work with them) and crack 2 eggs on top of each plate. Garnish with hot sauce and some extra cilantro.

DELICIOUS.

Love when the yolk oozes over the potatoes.
Enjoy with a friend (or significant other)!

Sunday, July 5, 2015

Recipe: Buttermilk Waffles (BC 4th Fest Style!)

This past long weekend, we had the pleasure of hanging out with part of our BC family. Joe and I volunteered to make breakfast for everyone Saturday morning, and the clear hit were the waffles. They're flavorful, crunchy and fluffy all at the same time!
Not the best photo, but I have many people who can vouch that they were delicious!

Ingredients:

  • 1 3/4 C AP flour
  • 1 t baking soda
  • 2 t baking powder
  • 1T granulated sugar
  • 1t salt
  • 1 stick (1/2 C) melted unsalted butter
  • 3 room temperature eggs
  • 1 1/2 C buttermilk
  • 1 T vanilla extract
  1. Mix the flour, baking soda, baking powder, sugar, and salt into one bowl.
  2. In a separate bowl, combine cooled butter with eggs, vanilla, and buttermilk. I find the easiest way to do this is to beat the eggs, drizzle in the butter until combined, add vanilla, and then drizzle in butter milk until combined.
  3. Dump the wet ingredients into the dry ingredients and mix to combine. Let sit one minute for the mixture to expand (remember when you mixed baking soda and vinegar together and it would volcano? Buttermilk will cause the same reaction because theoretically you can make buttermilk with milk that's been curdled with a bit of vinegar).
  4. Load about 3/4 C to 1 C into a hot waffle maker! I personally like to let it go for about 4 minutes. Makes about 3 waffles.


Sunday, April 19, 2015

Recipe: Dan Dan Noodle Soup

So I bought a book called "Chinese Rice and Noodles", because, well, I'm terrible at making Chinese food. I feel like one day when my kids are like, "Mom, make me something Chinese", I want to be able to make something more than fried rice. I'm going to slowly make my way through it, so here's the first of my "Ya'll Gonna Learn Chinese" (thanks Jin the MC) series.

I was all excited and sent my mom and dad a photo of my dinner, proud of my Chinese Sunday Night Dinner.

The response?

Mom: "Dan Dan noodles should be dry, no soup."
Dad: "Fusion"

But it was in the book, so I furiously texted back "It's in this book, it's a real thing"

Dad: "It is not a real thing. It is like pineapple or seafood pizza. Real thing to ABC (for those that don't know, that means American Born Chinese) not CBA"

So, fail. It was still pretty good though and a great quick and easy meal.

Dan Dan Noodle Soup in all it's ABC glory.
ABC Dan Dan Noodles Soup
Serves 2

Ingredients:
  • 1/4 lb. ground pork (or a 1/3-1/2 if you're omitting the tofu)
  • 1/2 a package of extra firm pressed tofu diced finely (this was my touch...because I didn't have enough pork)
  • 2 T. sweet bean paste
  • 2 small stalks of bok choy
  • 3 T. sesame paste
  • 3 T. water
  • 1 t. sugar
  • 1 t. rice vinegar
  • 2 T. soy sauce
  • 2 C. canned chicken soup + 2 C. water (Wait you don't just have chicken stock lying around from all the rotisserie chickens? You do? Then just use a quart of it!)
  • Scallions, cilantro, szechwan pepper, chili oil (all optional...sort of)
  • Dried noodles (I used two small fresh ramen packs)
Start by heating up your chicken stock (and if you have enough pots, start heating up water for cooking your noodles!). We like shiitake mushrooms and always have some lying around, so I throw two sliced up in there. You're probably not supposed to, but I like it, so why not. Once hot, you can blanch your bok choy in here. A minute or so and you can pull it out for later.
 
Then it's time to make the soup base. Mix the sesame paste, water, sugar, vinegar, and soy sauce together in a bowl, Sesame paste can be tough to work with. Sometimes heating it for 30 seconds and using hot water helps everything get smooth. Once well combined, split into two bowls.
Sesame paste should be sold in any Asian grocery store. I like this one.
Almost smooth!
In a dry pan, stir-fry meat and firm tofu (diced finely!). Break up the pork so that it's about the same size as your tofu. After meat is cooked through, add the 2T of bean paste and continue to stir-fry. This would be a good time to drop your noodles into your boiling water as well.
Sweet bean paste. Really handy to have around. 
If you're vegetarian, just double the tofu and eliminate the pork!
We're almost there!
Once that's done and your soup is heated, just dump the soup into your base and stir.
Ready for the rest of the yum!
Add the noodles, bok choy, and tofu/pork mixture. Top with scallions, cilantro, and chili oil/szechuan peppers. Serve hot and enjoy!
So many layers of flavor and a great way to wind down a weekend.
The best part of Sunday Night Dinner, is having Gags across from me.

Saturday, March 21, 2015

Recipe: What the 'Nduja?

I'm standing in line at Murray's Cheese Shop (this is something that happens often) and the guy in front of me says "Let me get a half pound of that 'Nduja (pronounced: nooja)". Of course I want in on this "nooja" so I order a 1/4 lb myself with zero idea of what I just ordered.

I look at the guy behind the counter, and I ask "What did I just order and what am I going to do with it?" I'm told to use it like chorizo (the crumbly kind, not the kind you serve with cheese).

So I finally go home and look up 'Nduja, which is described as a "spicy, spreadable pork sausage from Italy", or as I like to think of it, the chorizo of Italy.

So what's a girl supposed to do with the 'Nduja she acquired? What she always does: make tacos. Breakfast tacos to be exact.

Teenage 'Njuda Breakfast Tacos!
What the 'Njuda Breakfast Tacos
Makes about 6 tacos total.

Ingredients:

  • Salsa (tomatoes, red onion, garlic, jalapeno, cilantro, lime, and salt)
  • Cucumber
  • ¼ lb. of 'Njuda
  • 4 eggs (pull out a couple of the yolks if you're watching your cholesterol)
  • 1/2 red bell pepper
  • 1/2 onion (I like spanish, but whatever is lying around is fine)
  • 6 corn tortillas (not flour, because flour is gummy)
  • Extra cilantro and onions
  • Shredded cheese (optional, but not really if you live in my household)
Prepare your salsa (or open a jar). Slice cucumbers into rounds. Dice bell pepper and onion. Throw 'Nduja into a hot pan and break it up with your spatula. I like to sop up some of the oil as it starts to cook, but that's just me. Once the meat is browned, add the bell pepper and onion and saute until both are tender (onions should be translucent). Scramble and add your eggs and cook until just cooked (overcooked eggs are not good, so don't dry them out!). I don't usually add salt since the 'Nduja is salty enough for me, but feel free to season to taste. Toast your tortillas on a cast iron or open flame and assemble! Now eat breakfast like a boss!


'Nduja power!

Saturday, March 14, 2015

Recipe: Not Mémé Rita's Pork Pie (Tourtière)

If you want to start a debate at dinner in the Gagnon household, bring up pork pie. Everyone has a differing opinion on how it should taste and whose is the best. My father-in-law will remind everyone his mother's was so good that the local supermarket used to commission her to make them. Unfortunately, I never got to try Joe's mémé's (French for grandmother) pork pie so I'll never be able to say if it was the best.

Rumor has it that one of Joe's Aunts has Mémé Rita's recipe, but rumor also has it that Mémé Rita was a bit funny at times and would leave out key ingredients or steps when giving out a recipe, so we'll never know if she has the actual recipe.

After having two different versions of it during Christmas, I was tempted to give it a try, but never got around to it. One weekend afternoon I was flipping through America's Test Kitchen's "The Best of 2015" magazine and what recipe do I see? Tourtière! It was fate. I had to try my hand at it.

So here we go, I'm entering dangerous waters here. I'd like to present my version of pork pie, adapted from the ATK recipe. I know it won't be the same as Mémé Rita's, but I'm hoping that maybe (just maybe!) I've made her proud here, and she's chuckling that the Chinese girl her grandson married made an acceptable pork pie.
Tourtière Recipe (Makes 4 Mini Pies)
Ingredients

  • ½ t baking soda
  • 1 T water
  • 1 lb. pork
  • 1 T butter
  • 1 onion diced finely
  • 2 minced garlic cloves
  • 1 t minced fresh thyme
  • 1 t minced fresh sage
  • 1 t minced fresh rosemary
  • ½ t ground allspice
  • ½ t ground cinnamon
  • ¼ t fresh ground nutmeg
  • ¼ t ground cloves
  • 1 ½ C chicken broth
  • 1 medium sized potato (~6 oz) peeled and grated (using largest setting on box grater)
  • 2/3 C shortening / lard
  • 2 C all purpose flour
  • 5-6 T ice cold water

Dissolve 1 teaspoon of salt and the baking soda into the water and mix. Massage it into the pork and let the pork rest for 20-25 minutes.

I'm all about that mis-en-place.

In a pot, melt butter and sauté onions until caramelized. Then add garlic, herbs, allspice, cinnamon and nutmeg. Cook until fragrant. 


Add chicken broth and potato making sure to scrape up brown bits on bottom of the pan. 
Let cook and stir frequently until potatoes have softened and sauce is thick enough for you to leave a trail when you drag your spoon across the bottom of the pan.


Add the pork and break it up into the mixture. Cook until pork is no longer pink. Let mixture cool (until completely cooled) in the fridge, uncovered. Stir from time to time.


To make the crust, combine shortening and flour with a fork until it's crumbly and the shortening is in pea-sized clumps.


Add ice water 1 T at a time until it seems like it will come together and form into a ball. Wrap in plastic wrap and let rest in the fridge for at least 20 minutes. Once everything is cool and the dough is rested, it's time to assemble.


Before you start assembling, preheat your oven to 450°F. Roll out the crust - you'll need 8 discs total (4 tops, 4 bottoms). Press crust into the pan and then fill with cooled filling. Place another disc on top, using an egg wash (1 egg yolk + 1 T water beaten together) to seal the edges.


Cut a couple slits on the top and place into a 450°F oven for 15 minutes. Turn it down to 375°F and then let it go for another 20 minutes.


Let pie cool for 2 hrs (or more) and then reheat gently. Pie is meant to be served warm, but not hot.

A tribute to Joe's mémé and a great way to celebrate Pi day.

Sunday, March 8, 2015

"Recipe": Cashew Butter

You'll note that I put recipe in quotes, because I'm going to keep it real; this isn't a recipe. Really I just need to share with all the health nuts (pun intended) out there how amazingly easy it is to make cashew butter. Ok, you caught me, I actually have no idea if cashews are healthy, but a quick Google search seems to indicate that they are.

A delicious jar of cashew butter. Joe is a happy camper.
Ingredients:

  • Raw cashews pieces (it took a little more than 1/2 lb. to make a 7oz jar)
  • Salt (for the above, I did a 1/2 t.)
  • Honey (if you're so inclined, I was not)
You just throw it all into a food processor and blend until it's nice and creamy. Scrape down the sides every so often so you get an even blend. Be careful of your food processor overheating, at some point you will have to give it a small break. I've detailed the evolution below, just incase you start thinking I lead you astray.
All aboard.
Right now you're all like "Wait, I just made cashew powder, this isn't right", but KEEP GOING.
You're still doubting me, because now you're thinking "This isn't smooth and creamy, it's lump and grainy", but GRIND ON....because suddenly....
You get to this: CASH(ew) MONEY.  

Serving suggestions as follows:
  • In the morning, on toast
  • In the afternoon, on chia seed pudding with berries
  • Right before dinner (since your wife said dinner would be ready 30 minutes ago) straight out of the jar
Spread the word, make your own cashew butter, it's too easy not to!